
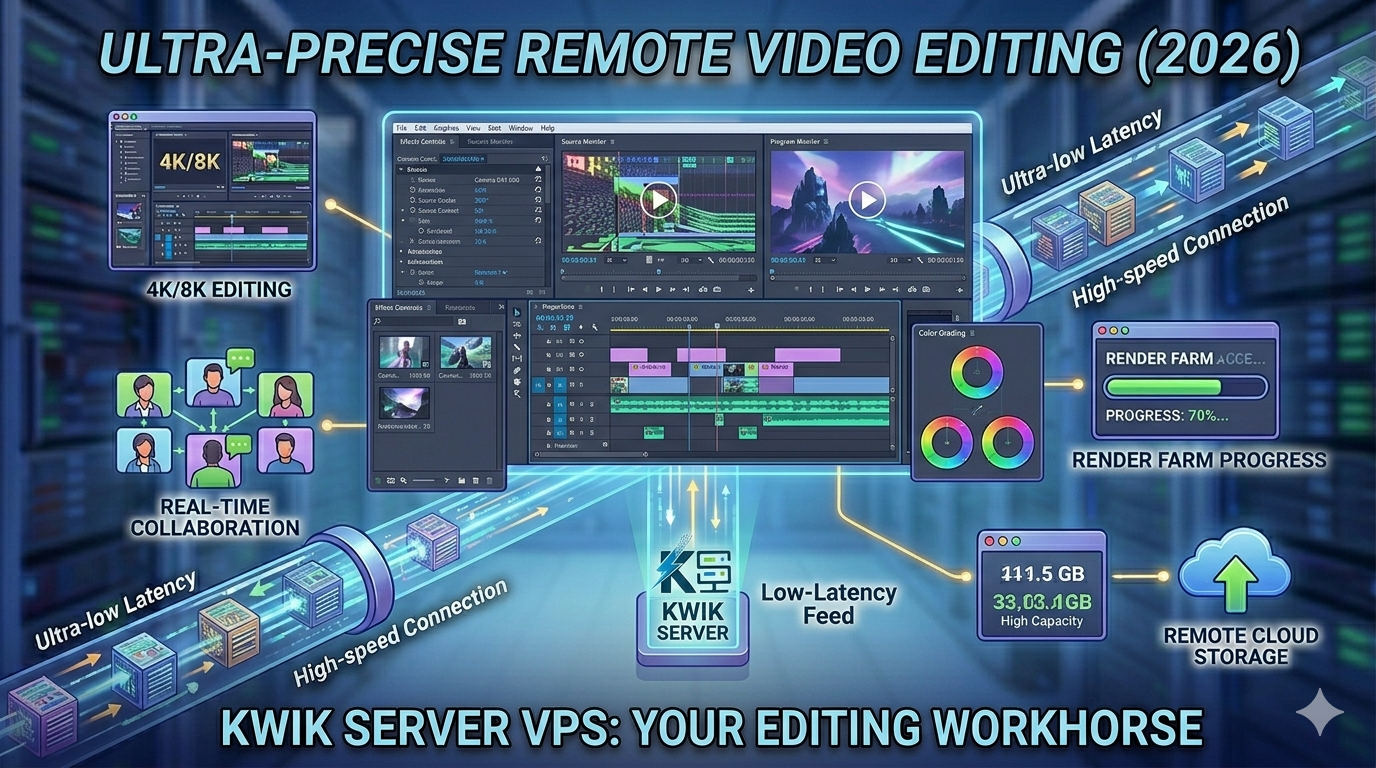
Your laptop is choking on a 4K timeline. Your fans are screaming. The render ETA says 6 hours. Sound familiar? Video editors worldwide are ditching local hardware limitations and moving their entire editing workflow to a cloud PC powered by a Windows VPS — and the results are game-changing. In this guide, we break down exactly how video editing on a cloud PC works, which software runs best, and how to get started today.
- Best Use Cases for Cheap RDP
- How Traders Use Low-Latency RDP
- 📍 Video Editing on Cloud PC (this post)
- Remote Office Setup Using VPS (coming soon)
- Best RDP for Programming and Coding (coming soon)
- Run Automation Tools on VPS (coming soon)
- Hosting Websites on Windows VPS (coming soon)
- Use RDP for 24/7 Downloads (coming soon)
- Multi-User Remote Workstation Setup (coming soon)
- Build Your Own Cloud PC Business (coming soon)
- What Is a Cloud PC for Video Editing?
- Why Editors Are Moving to Cloud PCs
- Which Video Editing Software Works on a Cloud PC?
- Recommended VPS Specs for Video Editing
- How to Set Up Your Cloud Editing PC in 6 Steps
- Pro Tips for Smooth Remote Editing
- Who Should Use a Cloud PC for Editing?
- Frequently Asked Questions
1. What Is a Cloud PC for Video Editing?
A cloud PC for video editing is simply a high-powered Windows VPS — a virtual machine running in a professional data center — that you access remotely through any device using a Remote Desktop connection. Instead of your laptop doing the heavy lifting, a remote server handles all the CPU-intensive and RAM-hungry tasks: rendering, encoding, color grading, and effects processing.
You connect to it via the standard Windows Remote Desktop client, and your full editing environment — software, project files, plugins, and preferences — is waiting exactly as you left it, from any device, anywhere in the world.
A Windows VPS from KwikServer gives you full administrator access, a genuine Windows license, and dedicated RAM — everything you need to run professional-grade video editing software without buying expensive local hardware.
2. Why Editors Are Moving to Cloud PCs
Video editing has always been one of the most hardware-demanding tasks a computer can perform. 4K footage, multi-track timelines, color grading, and visual effects push even high-end workstations to their limits. A cloud PC removes those limits entirely — and adds capabilities that no local machine can match.
-
No expensive hardware required Skip the $2,000 editing workstation. A Windows VPS with 8–16 GB RAM costs a fraction of that per month — and you can upgrade resources instantly when a big project demands it.
-
Render overnight, work in the morning Start a render on your cloud PC, disconnect, and go to sleep. The server keeps processing at full speed all night. Wake up to a finished export — without your laptop fan keeping you awake.
-
Edit from any device, anywhere Connect from your lightweight travel laptop, a tablet, or even a lower-spec home desktop. The processing power lives on the server — your local device only needs to display the screen.
-
Easy collaboration with teams Multiple editors can access the same project files on a shared VPS without syncing issues, version conflicts, or slow file transfers over external drives. Everyone works from the same centralized environment.
-
Your projects stay safe Data center infrastructure includes redundant storage and backups. No more losing a project to a crashed hard drive or stolen laptop. Your footage and project files remain secure on the server.
Important: Cloud PC editing works best with a stable internet connection of at least 10 Mbps for smooth remote desktop responsiveness. For working with raw 4K files, uploading footage to the server first via FTP or cloud storage is the recommended workflow — not streaming it in real time.
3. Which Video Editing Software Works on a Cloud PC?
The good news: virtually all major professional video editing applications run on a Windows VPS. Here is how the most popular tools perform in a cloud PC environment:
Runs excellently on a Windows VPS with 8+ GB RAM. Timeline editing, color grading, and multi-cam sequences all work smoothly. GPU-accelerated rendering performs well on cloud plans with dedicated GPU options.
The industry standard for color grading. The free version runs well on 8 GB RAM. DaVinci Resolve Studio benefits significantly from GPU acceleration — ideal on a VPS with GPU add-on. Fusion effects and Fairlight audio run on the same server.
A lighter-weight alternative to Premiere, Vegas Pro is very cloud-PC-friendly. It handles 4K timelines efficiently on 6–8 GB RAM and is a great choice for editors who want fast rendering without the Adobe ecosystem.
Perfect for content creators and YouTubers who need speed over complexity. Filmora runs smoothly on even entry-level VPS plans with 4 GB RAM, making it ideal for social media video production on a budget.
Free editing options that run surprisingly well on cloud PCs. Both support multi-track timelines, transitions, and basic effects. Great starting points for freelancers testing cloud editing before investing in premium software.
For batch transcoding and format conversion, these tools are a cloud PC’s best friend. Run overnight transcoding jobs on your VPS — converting dozens of files at full CPU speed — without touching your local machine.
4. Recommended VPS Specs for Video Editing
Choosing the right plan is critical for a smooth cloud editing experience. The requirements vary depending on your footage resolution and editing complexity. Here is a practical breakdown:
| Use Case | RAM | CPU (vCores) | Storage | Suitable For |
|---|---|---|---|---|
| 1080p Light Editing | 4 GB | 2 vCores | 80–100 GB SSD | Filmora, basic Premiere |
| 1080p / 2K Professional | 8 GB | 4 vCores | 150–200 GB SSD | Premiere Pro, Vegas Pro |
| 4K Editing & Color Grading | 16 GB | 6–8 vCores | 300–500 GB SSD | DaVinci Resolve, Premiere 4K |
| Heavy VFX / Motion Graphics | 32 GB | 8–16 vCores | 500 GB+ SSD | After Effects, Resolve Fusion |
| Batch Transcoding Only | 4–8 GB | 4–8 vCores | 200 GB SSD | HandBrake, FFmpeg |
You can explore all available plans on the KwikServer Windows VPS page — choose the plan that matches your resolution and workflow, and upgrade whenever a bigger project demands it.
5. How to Set Up Your Cloud Editing PC in 6 Steps
Getting your cloud video editing environment up and running is straightforward. Here is the complete process from zero to editing:
-
1Choose Your Windows VPS Plan
Visit KwikServer’s Windows VPS page and select a plan based on your editing needs. For most editors starting out, an 8 GB RAM plan with 4 vCores is the ideal entry point. You can always scale up later.
-
2Connect via Remote Desktop
Once your VPS is provisioned, use the Windows Remote Desktop client (mstsc.exe on Windows, Microsoft Remote Desktop on Mac/iOS/Android). Enter the provided IP, username, and password. Your cloud desktop appears within seconds — it is a full Windows environment.
-
3Install Your Editing Software
Download and install your preferred editor — Premiere Pro, DaVinci Resolve, Vegas Pro, or any other — directly on the VPS from the developer’s official website. Since you have full admin access, there are no installation restrictions whatsoever.
-
4Transfer Your Footage to the VPS
Upload your raw footage to the VPS using FTP (FileZilla), Google Drive, Dropbox, or Windows shared folders. For large 4K projects, upload overnight. The server’s high-speed data center connection makes transfers significantly faster than typical home internet speeds.
-
5Edit, Color Grade & Apply Effects
Work on your timeline as you normally would — the remote desktop streams the interface to your local screen in real time. CPU-heavy effects, color grades, and previews all process on the server’s dedicated hardware, not your laptop.
-
6Queue Renders & Disconnect
Set your export settings, start the render queue, and simply close your Remote Desktop session. The VPS keeps rendering at full speed. Return hours later to download your finished file — the render continued uninterrupted even while you were away.
6. Pro Tips for Smooth Remote Editing
🖥️ Optimize Your RDP Display Settings
When connecting via Remote Desktop, set the color depth to 32-bit and enable font smoothing under the “Experience” tab. For editing work, also increase the Remote Desktop window resolution to match your local screen size — this makes the editing timeline and color panels much more comfortable to work with.
📁 Keep Project Files Organized on the VPS
Create a clear folder structure on the VPS from day one: separate folders for raw footage, project files, exports, and assets. Since the VPS is a shared resource with limited SSD space on entry plans, keep the drive tidy by deleting raw footage once a project is finished and backed up externally.
⚡ Use Proxy Workflows for Smoother Playback
Even on a powerful VPS, streaming 4K footage over a Remote Desktop connection can cause choppy playback. Create lower-resolution proxy files (1080p or even 720p) for editing, then switch to full resolution only for the final render. Both Premiere Pro and DaVinci Resolve have built-in proxy workflow tools that make this process seamless.
🔁 Schedule Renders During Off-Peak Hours
If you are on a shared VPS plan, server load is typically lower between midnight and 6 AM. Queue your longest render jobs for overnight to take full advantage of maximum CPU availability. Some editors run three or four export jobs back to back through the night — something impossible on a laptop left running.
Pro Tip: Install Google Drive for Desktop or Dropbox on your VPS. This lets you seamlessly sync completed exports directly to your cloud storage from the server — so finished videos are available for download on any of your devices without a manual transfer step.
7. Who Should Use a Cloud PC for Video Editing?
🎥 YouTube Creators & Content Producers
Creators who upload multiple videos per week often find their local machines bottlenecked by export queues. A cloud PC lets them edit one video locally while the VPS simultaneously renders the previous one — effectively doubling their production capacity without buying new hardware.
🎓 Freelance Editors Working on Client Projects
Freelancers often work on borrowed or older hardware. A KwikServer Windows VPS gives them access to a consistently powerful, professional-grade editing environment that impresses clients and meets deadlines — without the capital investment of a workstation build.
🏢 Small Production Studios
A shared Windows VPS accessible via multiple RDP sessions lets a small team of editors access centralized project assets without expensive NAS storage or a physical server room. Everyone works from the same environment, reducing file sync headaches dramatically.
✈️ Remote Editors & Digital Nomads
Editors who travel frequently face the challenge of carrying powerful hardware on the road. With a cloud PC, a lightweight laptop becomes a fully capable editing workstation — the heavy processing happens on the VPS while you work from a café, hotel room, or anywhere with a stable connection.
🎓 Students Learning Video Production
Video production students often cannot afford the hardware needed to run DaVinci Resolve or Premiere Pro at full quality. An affordable VPS from KwikServer gives them access to a proper editing environment for the cost of a few cups of coffee per month — leveling the playing field completely.
Ready to Edit Without Hardware Limits?
Get a KwikServer Windows VPS — full admin access, genuine Windows license, scalable RAM from 4 GB to 32 GB, and NVMe SSD storage. Start editing smarter today.
🚀 View Windows VPS Plans8. Frequently Asked Questions
-
Yes, absolutely. Both applications install and run on Windows Server just like they do on a regular desktop Windows machine. The key is having sufficient RAM — 8 GB minimum for 1080p work, 16 GB for comfortable 4K editing. KwikServer’s Windows VPS plans come with genuine Windows licenses and full admin access, so there are no software installation restrictions.
-
The interface — timeline clicks, menu navigation, and panel interactions — feels responsive over a good internet connection. The one area where Remote Desktop editing differs from local editing is real-time video playback, which can appear choppy on high-resolution footage. The solution is to use proxy files for editing (a standard professional practice) and only switch to full resolution for final export rendering.
-
There are several ways: (1) Use FTP software like FileZilla to upload files from your local machine to the VPS. (2) Upload footage to Google Drive or Dropbox on your local machine, then download it onto the VPS from within the Remote Desktop session. (3) Use Windows shared folders to drag and drop files directly between your PC and the VPS. For large 4K files, FTP is the fastest method, especially with data center-grade download speeds on the VPS end.
-
KwikServer’s Windows VPS plans are among the most affordable in the market. An 8 GB RAM plan suitable for professional 1080p editing starts at a low monthly rate, and you can scale up to 16 GB or 32 GB as your projects grow. Visit the Windows VPS page for current pricing and available configurations.
-
Yes, After Effects runs on a Windows VPS. It is one of the most RAM-hungry applications in the Adobe suite, so you should aim for at least 16 GB RAM for compositing work, and 32 GB for complex multi-layer compositions and motion graphics. The biggest advantage is running long render queues overnight on the VPS while you use your local machine for other tasks.
-
Your VPS is a private, isolated machine accessible only with your login credentials. KwikServer’s data center infrastructure includes physical security, network firewalls, and encrypted connections. That said, we always recommend keeping a backup copy of your project files and raw footage in an external location — such as Google Drive or a local hard drive — as a best practice regardless of where you edit.